Acrylic sheets are used in all kinds of projects — from home décor to signs, displays, and protective covers. They’re clear, durable, and much safer than glass. But if you’ve never handled them before, you might be wondering how to cut acrylic sheet without cracking or chipping it.
The good news? With the right techniques and basic tools, cutting acrylic sheets can be simple and safe. In this guide, we’ll cover everything from scoring knives to jigsaws, table saws, and even laser cutters. By the end, you’ll know the best way to cut acrylic, whether for small DIY projects or larger, more complex pieces.
Types of Acrylic & How That Affects Cutting
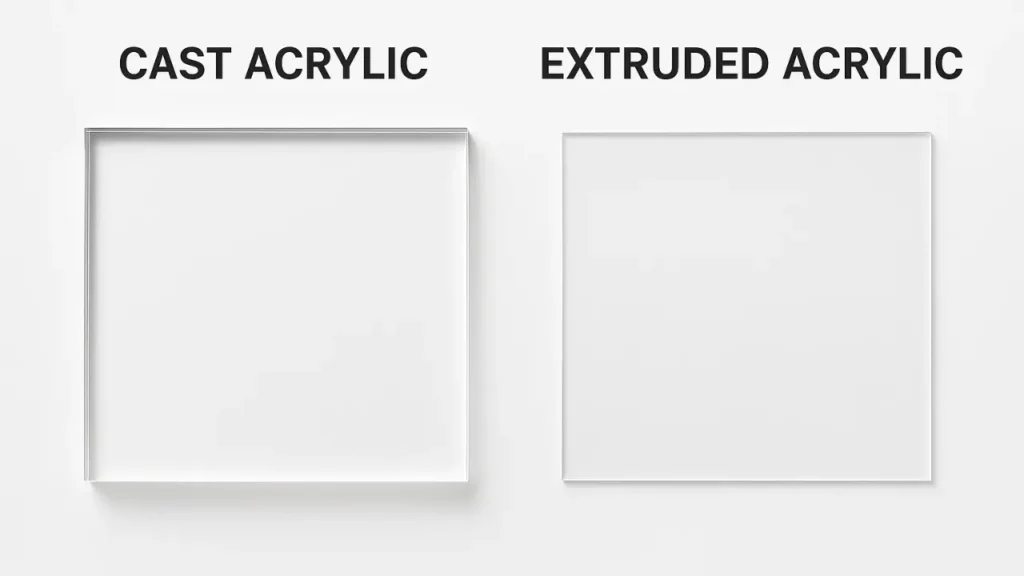
Acrylic sheets mainly come in two types: cast acrylic and extruded acrylic. They may look similar, but they behave differently when you cut them. Knowing the difference will help you choose the right method and avoid rough or cracked edges.
1. Cast Acrylic
Cast acrylic results from pouring liquid acrylic into molds. Because of this process, it’s stronger, more durable, and scratch-resistant.
How it cuts:
- Cuts cleanly with most tools
- Less likely to melt while cutting
- Ideal for detailed or polished edges
Best for:
- Laser cutting
- Projects where edges will be visible
- DIY crafts, displays, and decorative pieces
2. Extruded Acrylic
Extruded acrylic is made by pushing acrylic through a machine. It’s cheaper and more flexible, but it can react differently when cut.
How it cuts:
- Can melt more easily with power tools
- Can chip if cut too fast
- Works well for straight cuts
Best for:
- Score-and-snap method
- Large sheets
- Budget-friendly projects
Which Should You Choose?
- Want clean, smooth edges → Cast acrylic
- Need only straight cuts → Extruded acrylic
- Using a laser cutter → Cast acrylic gives a clearer, polished finish
How to Cut Acrylic Sheet: Overview of Methods
Cutting acrylic doesn’t have to be intimidating. There are options for every skill level and budget — from high-tech laser cutters to simple DIY tools like scoring knives or jigsaws. Understanding the best way to cut acrylic depends on the thickness and type of acrylic sheet you’re working with.
Here are the main methods we’ll cover:
- Scoring and snapping — for thin sheets and straight cuts
- Using a jigsaw or handsaw — for curves and small projects
- Table saw or circular saw — for larger sheets and long, straight cuts
- Laser cutting — for precision and polished edges
No matter which method you choose, knowing the pros and cons of each will help you get smooth, clean results.
Tool-by-Tool Cutting Methods
1. Scoring Knife / “Score-and-Snap” Method
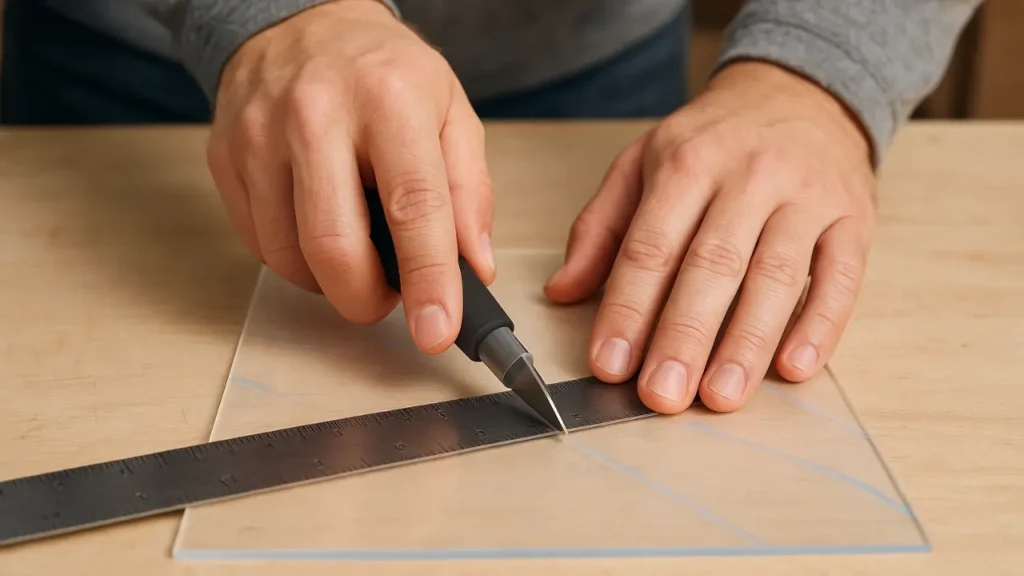
This is perfect for thin sheets (usually under 6mm) and straight cuts. It’s a safe and easy method, ideal for beginners learning how do you cut acrylic at home.
Step-by-step:
- Mark the cutting line on the protective film.
- Use a straightedge to guide your knife.
- Score the line firmly, making multiple passes if needed.
- Place the sheet on a table edge and snap along the line.
Best for: Quick, straight cuts for hobby projects, displays, or small DIY crafts.
2. Using a Jigsaw (or Coping/Bandsaw)
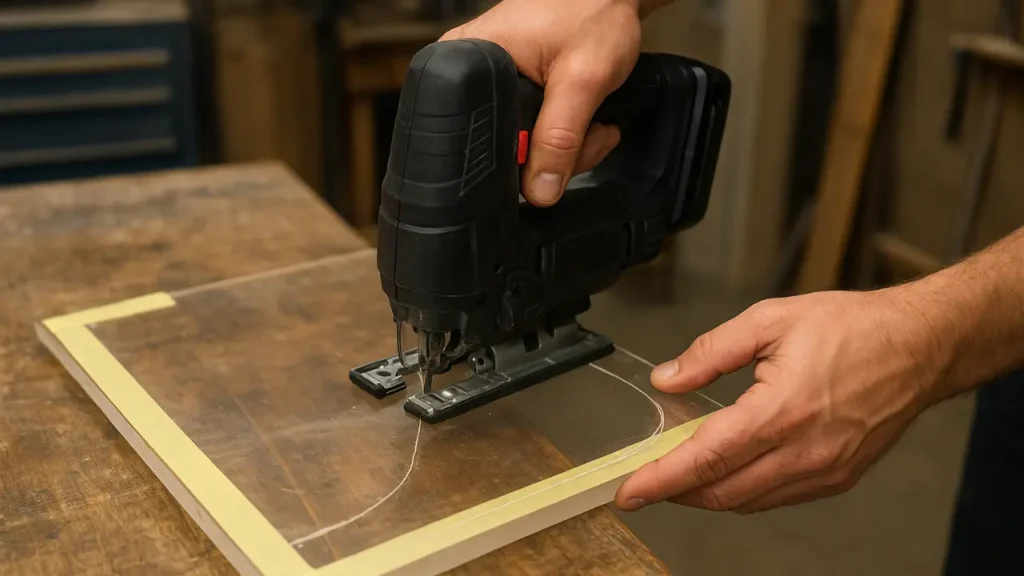
A jigsaw works best for curves and freeform shapes. This method is suitable for medium-thickness sheets and is ideal if you want to learn how to cut plexiglass or acrylic creatively.
Tips:
- Use a fine-tooth blade made for plastic or metal
- Cut slowly to avoid melting the edges
- Support the sheet properly to prevent vibrations
- Keep the protective film on or use masking tape to avoid scratches
Best for: Curved shapes, intricate patterns, or small DIY projects where straight cuts aren’t enough
3. Table Saw / Circular Saw / Bandsaw
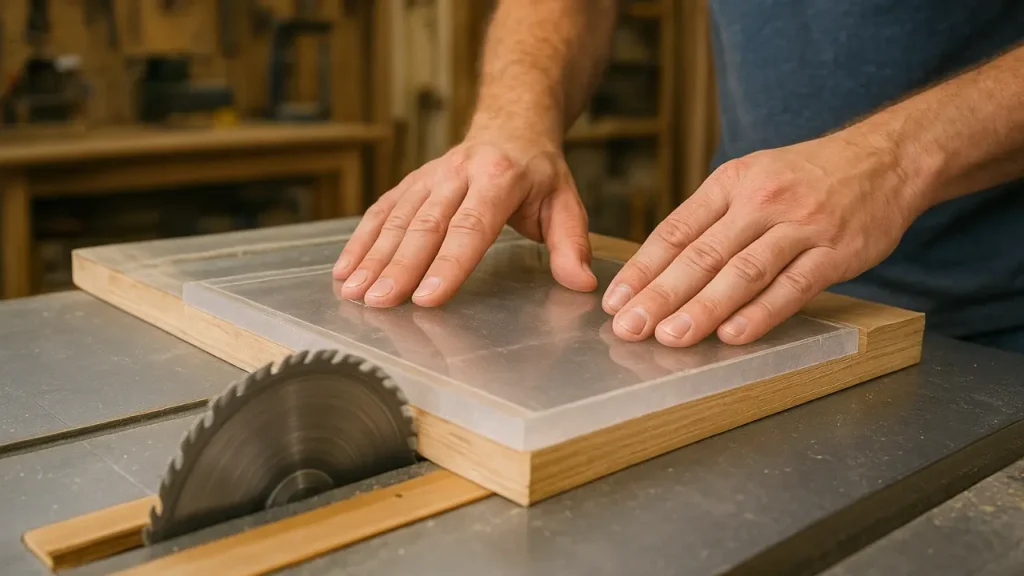
For larger or thicker sheets, these power saws are perfect for long, straight cuts and breaking down big sheets into smaller pieces. This method is great if you want the best way to cut acrylic on big sheets.
Pro tips:
- Sandwich acrylic between sacrificial boards to prevent chipping
- Use fine-tooth blades designed for plastics or metal
- Cut slowly to avoid melting or rough edges
Best for: Large sheets and projects needing precise, long straight cuts
4. Laser Cutting

Laser cutting is the most precise method. It uses focused light to cut acrylic without mechanical stress, giving smooth, polished edges.
Advantages:
- Smooth curves and clean edges
- Minimal risk of chipping
- Perfect for intricate or professional projects
Limitations:
- Not everyone has access to a laser cutter
- Usually more expensive than DIY methods
Best for: Custom signage, complex shapes, or projects requiring a professional finish
Quick Method Summary
| Method | Best For | Pros | Cons |
|---|---|---|---|
| Score-and-snap | Thin sheets, straight cuts | Simple, cheap, safe | Only straight cuts |
| Jigsaw | Curves, freeform cuts | Flexible, creative shapes | Can chip or melt if cut too fast |
| Table/Circular Saw | Thick/large sheets, straight cuts | Clean long cuts | Needs power tools, careful setup |
| Laser Cutting | Complex shapes, polished edges | Precise, professional finish | Expensive, access needed |
Finishing the Edges After Cutting
Even with the cleanest cutting methods, acrylic edges often need some finishing to look smooth and professional. Cuts made with saws, jigsaws, or even score-and-snap can leave rough, dull, or slightly chipped edges, so taking a few extra steps to finish them is important.
Sanding the Edges

Sanding is the most common way to smooth acrylic edges. Here’s a simple workflow:
- Start with coarser sandpaper (around 120 grit) to remove any roughness.
- Gradually move to finer grits (220 → 400 → 600) to refine the edge.
- Keep the sanding motion steady and even along the edge to avoid uneven surfaces.
- For corners or curves, wrap sandpaper around a block or dowel for better control.
This method works for straight and curved edges alike, and it helps prevent scratches or uneven surfaces.
Polishing for a Glossy Finish
If you want clear, glass-like edges, polishing is the next step:
- Use a buffing wheel or polishing compound to shine the edges.
- Move slowly to avoid generating too much heat, which can melt or warp the acrylic.
- For small DIY projects, a manual polishing stick or fine sandpaper (1000–2000 grit) can also give a nice finish.
Quick Tips:
- Always keep the protective film on until finishing is complete to avoid scratches.
- Test polishing techniques on a scrap piece before the final project.
- For a mirror-like finish, flame polishing is an advanced method, but it requires caution and practice.
General Tips & Common Pitfalls — What to Do (and What to Avoid)
Cutting acrylic is easy once you know the tricks, but small mistakes can ruin your project. Follow these tips to get smooth, professional results safely.
Keep the Sheet Cool
Acrylic can warp, bubble, or melt if it is cut too fast or with a dull blade. Always cut slowly and steadily using power tools. If you can, pause sometimes to let the sheet cool. On thin sheets, even the rubbing from hand tools can heat the acrylic, so take it easy.
Always Support the Sheet
Unsupported acrylic may crack or develop stress marks. To support the sheet, use clamps, a flat surface, or sacrificial boards under the sheet. Avoid bending the sheet at all during cutting, as even slight pressure may cause permanent cracks.
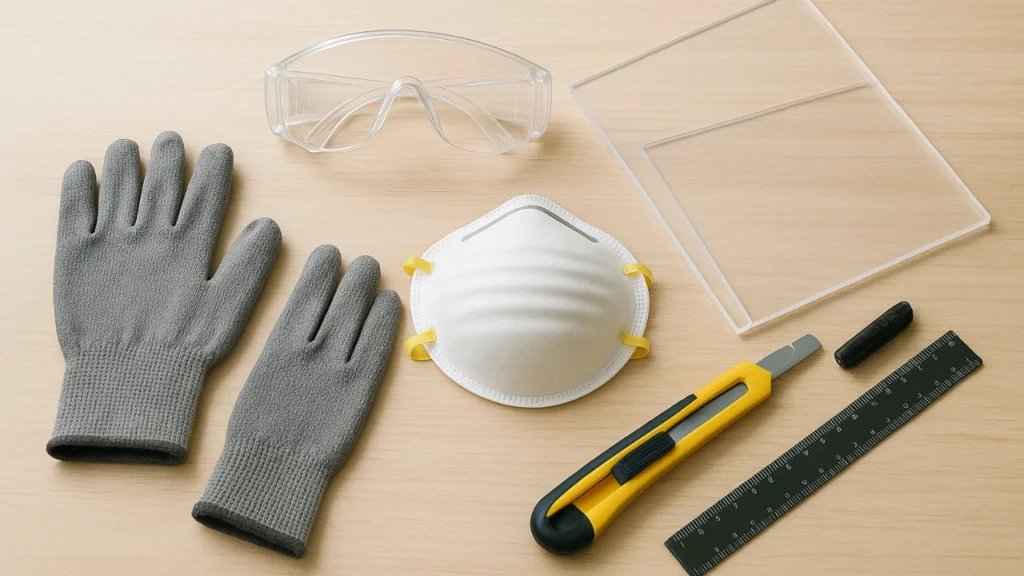
Keep the Protective Film On This film guards against scratches and dust. Just leave it on until you’re done, and the acrylic will appear clean. Masking tape along cut lines is also an option for extra protection. Wear Safety Gear Pieces of acrylic and sharp edges may cut or otherwise injure you. Always wear gloves and safety glasses. If you’re sanding or polishing, consider a dust mask too, since acrylic dust can irritate the lungs.
Practice First
Before working on your final piece, cut a scrap sheet. This lets you:
- Test your tool settings and speed
- Practice curves or snap techniques
- See how the acrylic reacts to your cutting method
This simple step can save time, money, and frustration.
Extra Tips from DIY Experts
- Mark and measure twice: Even slight misalignment can ruin a clean cut. Use a ruler and fine-tip marker.
- Use sharp, appropriate blades: Dull blades increase chipping and rough edges. Fine-tooth blades for jigsaws or table saws are ideal.
- Consider edge treatment: After cutting, sanding and polishing not only smooth the edges but also reduce stress points that could crack later.
- Plan your cuts: For large sheets, sketch out all cuts in advance to minimize waste and mistakes.
Conclusion & Encouragement
Cutting acrylic is easier than it seems once you know how to cut acrylic sheet safely. Start with thin sheets and straight cuts to build confidence, then move to curves and more complex designs.
Even though advanced tools like laser cutters exist, many DIYers achieve excellent results with simple tools at home, such as scoring knives, jigsaws, or table saws. The key is to work slowly, support the sheet properly, and finish the edges carefully.
With practice, you can create clean, professional-looking acrylic projects. Every cut teaches you more about the material, making small DIY projects into functional, beautiful pieces. Using these techniques, Flat Laser Cutting can help you understand how to cut Perspex acrylic sheet or plexiglass safely, efficiently, and with professional results.